What to do first
So, you've just downloaded XLE, and you're wondering what to do first? Here's a suggestion for the first 10 minutes:
Startup the level editor
Select the Level Editor as the startup project:

You should use the Debug/x64 or Release/x64 configuration. Though XLE works in both 32 bit and 64 bits modes, normal usage for the level editor should be in 64 bits mode.
If you have trouble compiling, see the Getting Started Compiling page.
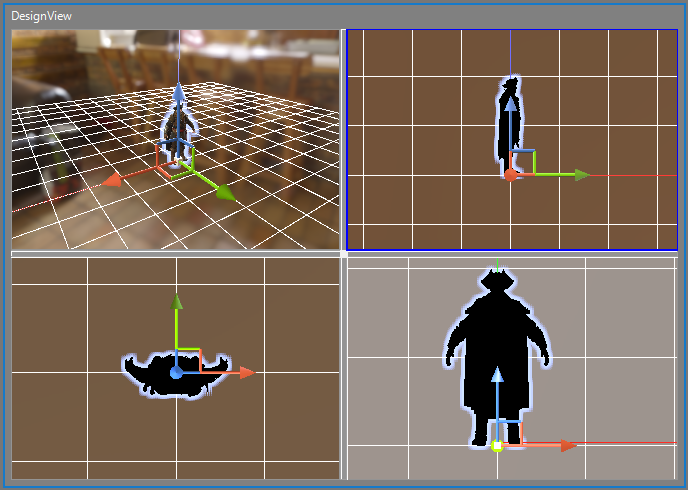
Start up this application, and you should see a large 3D window and various other windows about.
The level editor is based on a great project from Sony WWS SonyWWSLevelEditor. It has been modified to work with XLE, and some XLE specific behaviour has been added. I think this is a great example of the Open Source concept working for games developers.
Creating an object
For the first minute, the 3D window will appear black. This is because shaders are compiling in the background. They will get flushed to disk on application shutdown, so it only happens the first time.
Select "Window/Resources" to open the resources panel. You should see the directory structure under the "working" folder. Here, you can find .dae (Collada) files.
Find a dae file, and drag it into the 3D viewport (or you can drag from Windows Explorer).
Collada notes
XLE should support all well formatted Collada files. But unfortunately some exporters produce poorly formatted files. For example, sometimes texture names are prefixed with "file://" -- this isn't supported in XLE.
But you should be fine with the Blender Collada exporter, or the OpenCollada exporter for Max/Maya. You can also use Open Asset Import Library to convert files to Collada format.
Placement documents
In the level editor, the main "game" file is like a solution file in Visual Studio. It contains links to project documents under it. One type of document is a "placements" document (called a placements cell). This contains a list of static objects with basic properties.
Normal large world games should have many placement cells. These can be arranged in a grid structure. But cells can also be overlapping, or have irregular shapes.
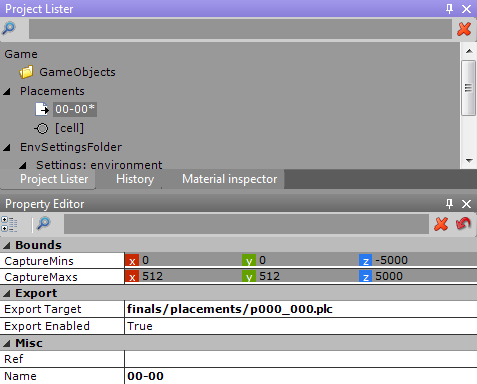
When you first startup the Level Editor, you get a default untitled placements document. However, you can reconfigure it by right-clicking "Placements" in the Project Lister and selecting "Configure placements..."
Adding lighting settings
Probably, you will want to play with some lighting settings next.
First, Find the "Palette" window (select "Window/Palette" to enable it if it isn't visible).
Here, open up the "Lights" category. You can drag items from the "Palette" window into the "Project Lister".
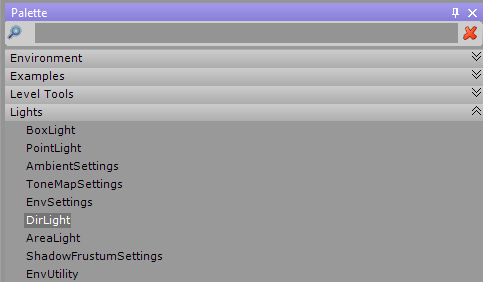
Drag these 4 items from the "Lights" category of the "Palette" into the "Project Lister":
- DirLight
- AreaLight
- AmbientSettings
- ToneMapSettings
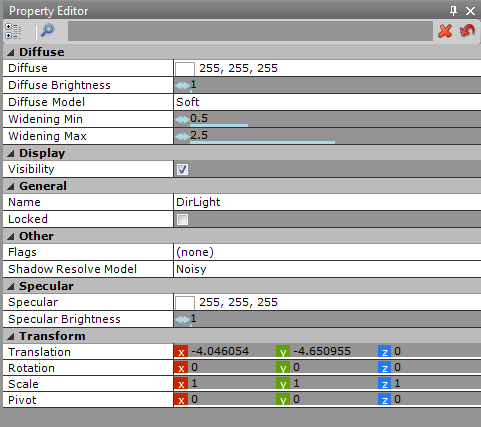
Try selecting the newly created "DirLight" in the Project Lister. You can press "M" to enable the "move" manipulator to move it around.
Now, find the "Property Editor" window (select "Window/Property Editor" if it is hidden). Here you can see all of the properties for the item. You can customize the lighting environment by playing with the settings for the 4 items you created.
Console debugging modes
Next, find the "IronPython" window (use Window/Iron Python to enable it if it is hidden).
Try typing "cv.DeferredDebugging = 1". This will enable a debugging mode. You can type "cv.DeferredDebugging = 0" to disable it again.
Here, "cv" stands for "console variable".
What about the next 10 minutes?
Well, that's the end of the quick introduction. The rest is up to you. Have fun!
blog comments powered by Disqus